React Native项目如何编译成鸿蒙应用
本文以@react-native-community/datetimepicker 作为示例,详细介绍具体步骤。
RN 鸿蒙支持文档:https://gitee.com/react-native-oh-library/usage-docs/tree/master/zh-cn
环境配置
- 安装 DevEco Studio 点击下载
- 下载 HarmonyOS SDK
- 下载 node.js (v18.14.0+)
- 配置 HDC 环境变量(配置到 window 系统变量中)
1 | HDC_SERVER_PORT = 7035 |
示例工程
(1)创建一个 react-native 工程
npx react-native@0.72.5 init AwesomeProject --version 0.72.5
(2)安装react-native-harmony
1 | { |
PS: 配置好后,执行下npm install, 要装下react-native-harmony包
(3)替换工程文件
AwesomeProjectReplace.zip已存放百度网盘,主要是metro.config.js和package.json文件
1 | -------------------package.json------------------ |
1 | ----------------------metro.config.js----------------------------- |
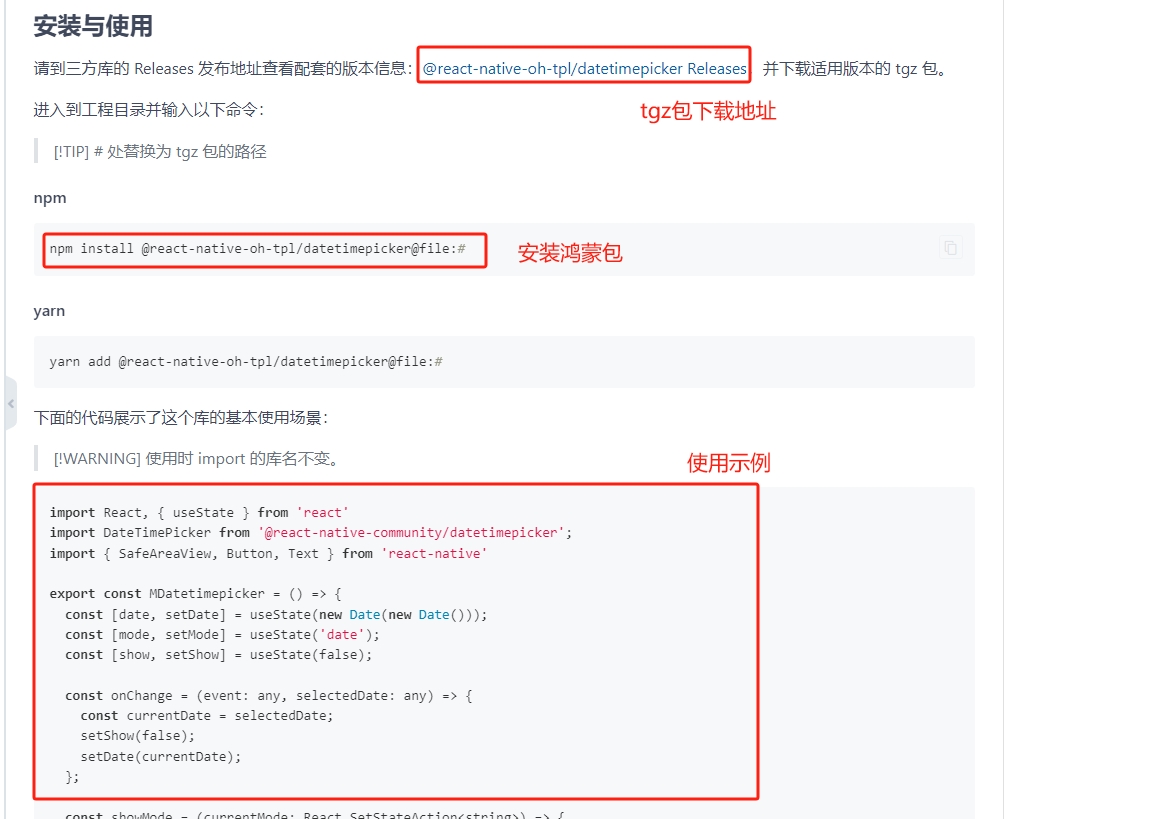
(4)安装@react-native-community/datetimepicker
参考安装文档: @react-native-community/datetimepicker
1 | 1.下载 react-native-oh-tpl-datetimepicker-7.6.2-0.1.1.tgz |
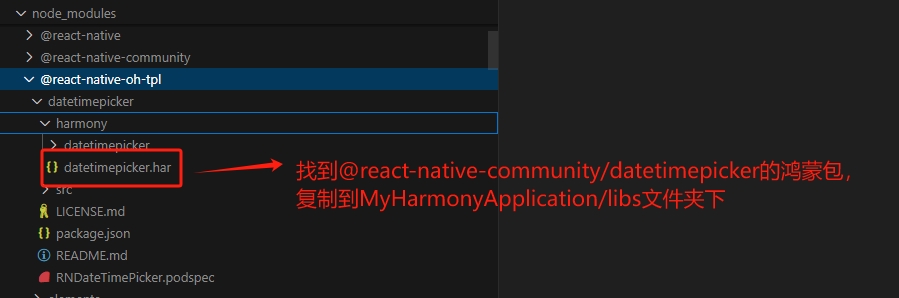
(5)把@react-native-oh-tpl/datetimepicker 鸿蒙包(.har)复制到鸿蒙项目
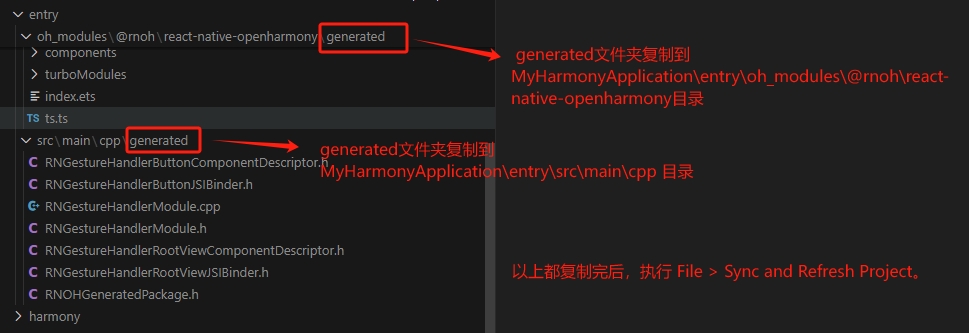
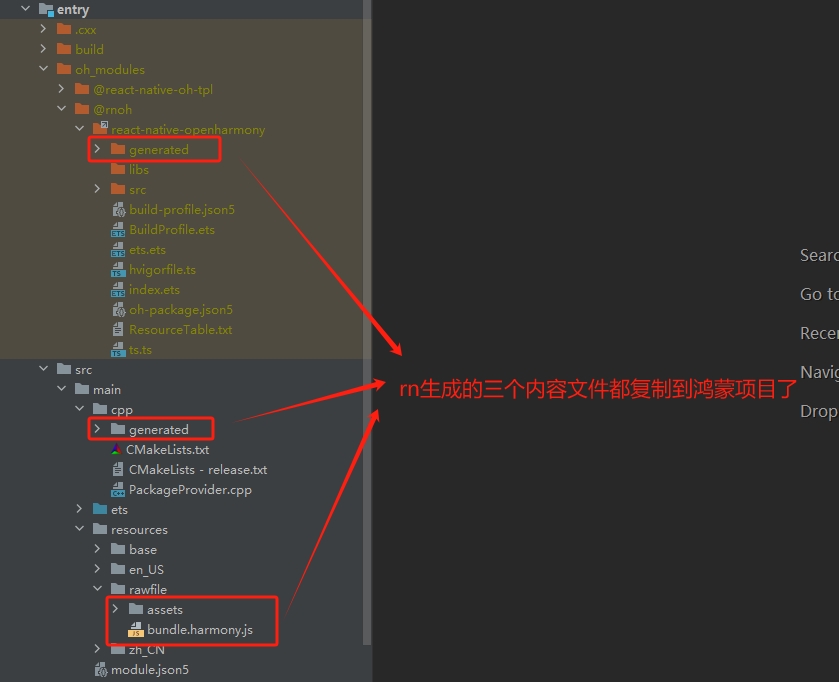
(6)使用 codegen 生成鸿蒙代码, 并复制到鸿蒙项目
1 | // <!-- package.json --> |
1 | // <!-- build.js --> |
1 | // <!-- copy-to-harmony.js --> |

(7) 新建鸿蒙项目
这里不再赘述,点击参考文档
(8) 安装鸿蒙包依赖
进入 entry 目录执行ohpm install
1 | // <!-- entry/oh-package.json5 --> |
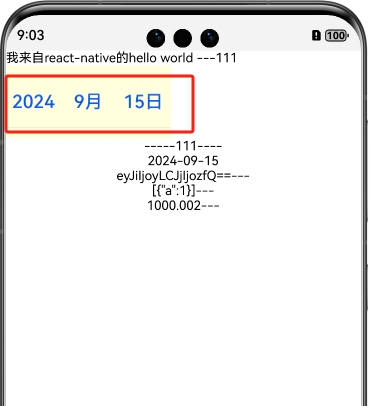
(7)模拟器运行效果
鸿蒙打包&发布
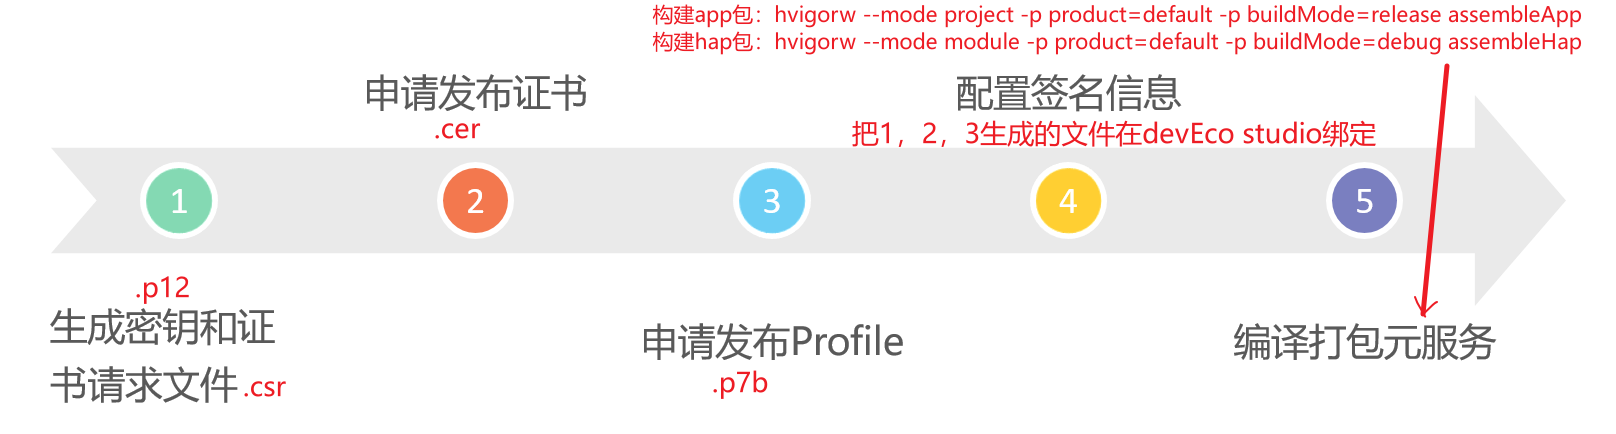
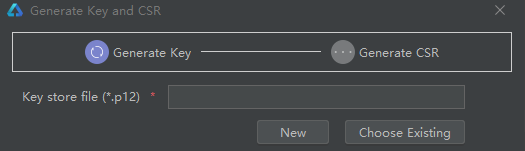
(1)生成密钥和证书请求文件
选择“Build > Generate Key and CSR”,填好表单内容就行了。 (ps: 把所有的文件放在一个文件夹中)
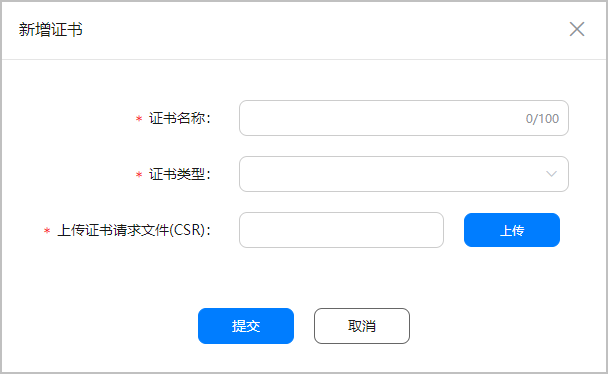
(2)申请发布证书并下载(csr和证书绑定)

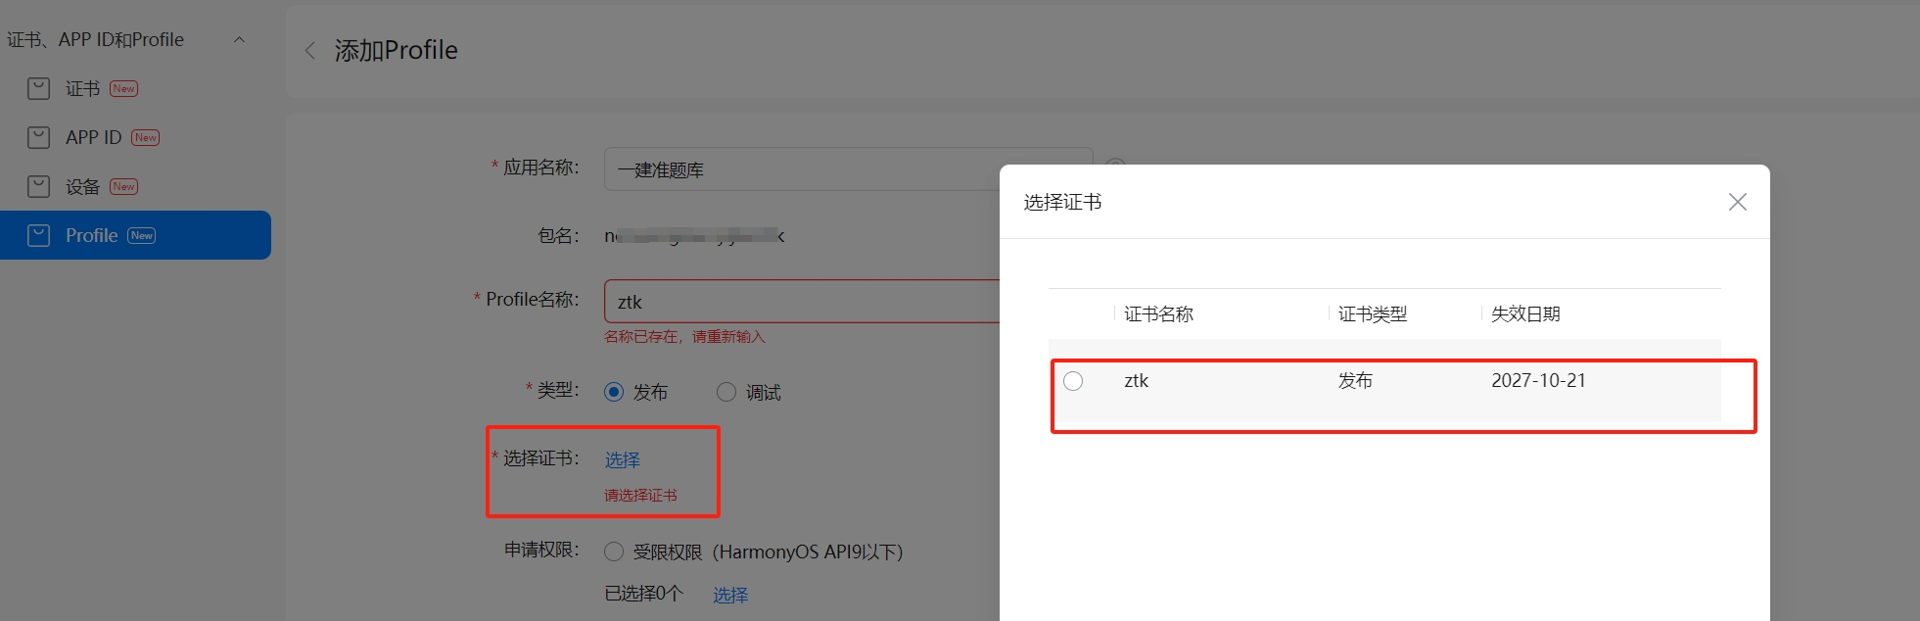
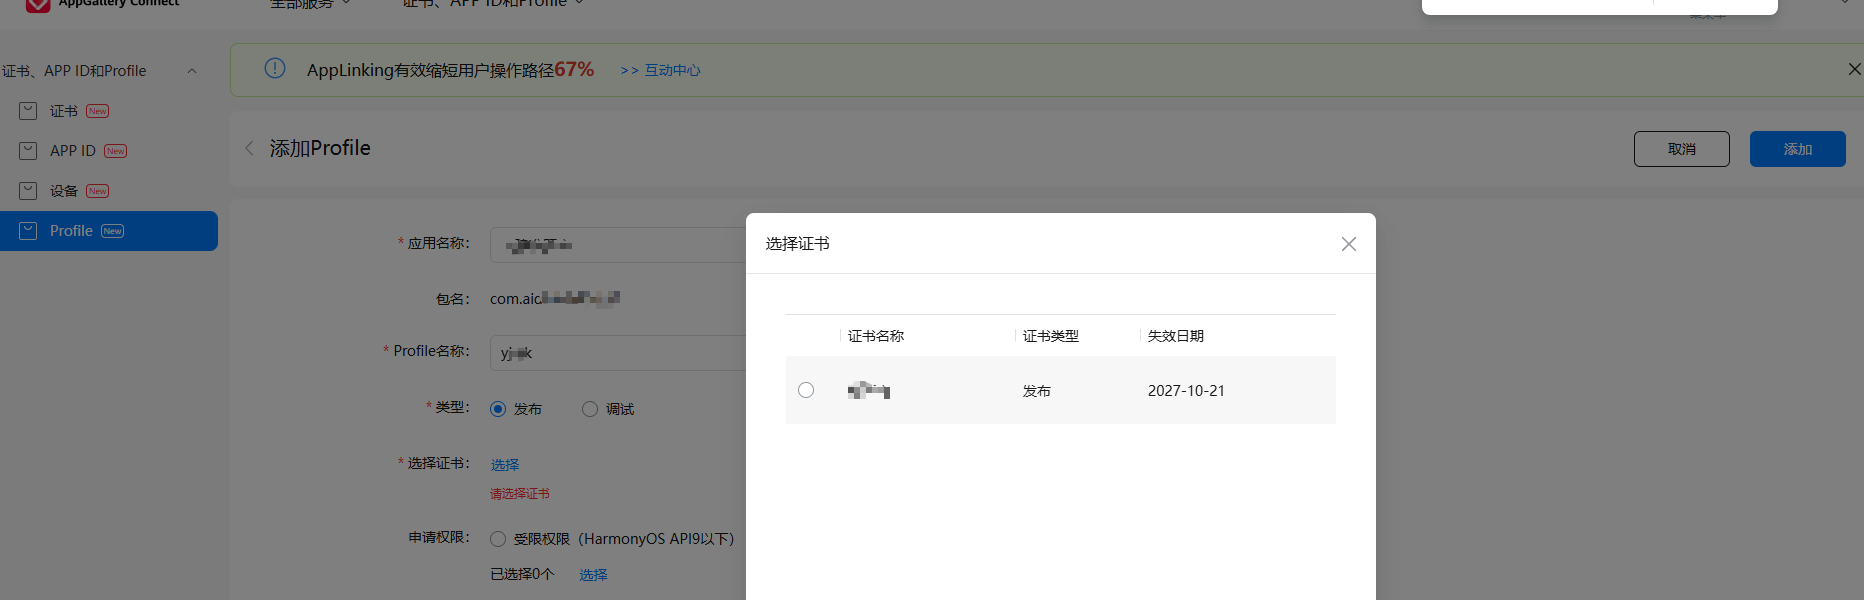
(3)申请发布Profile并下载(profile把证书和app包名绑定)

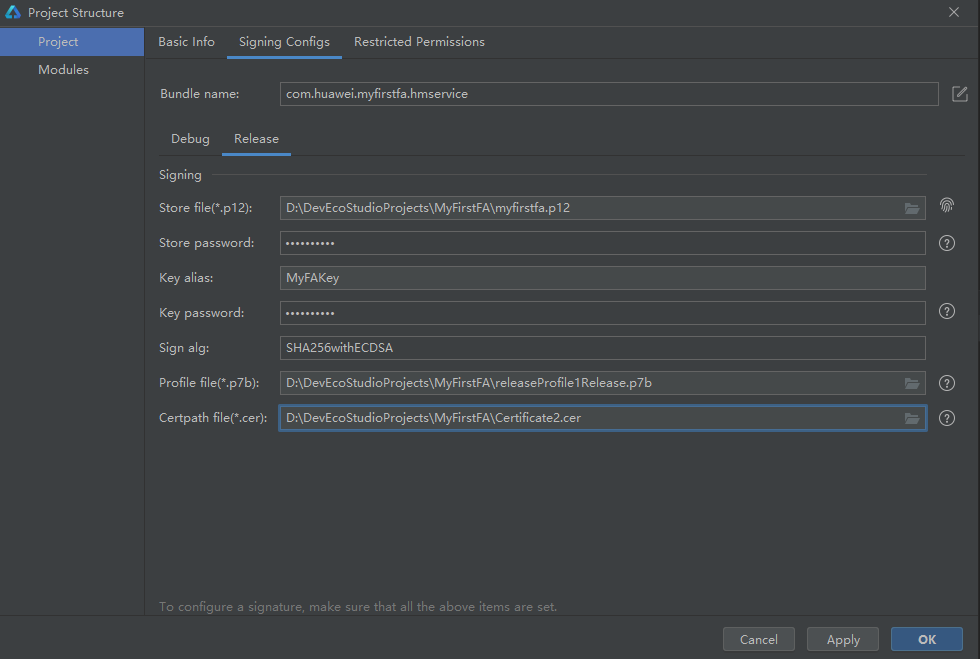
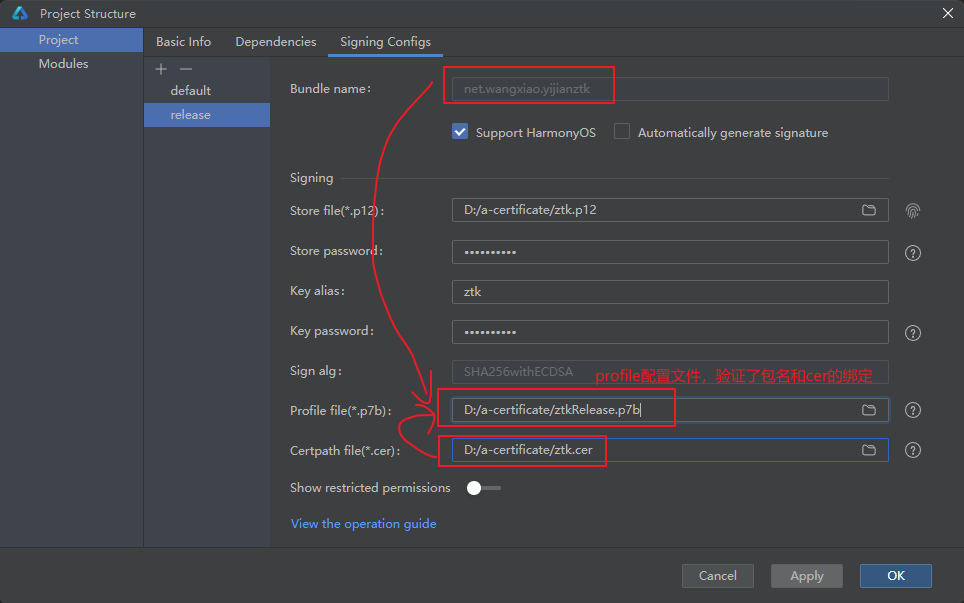
(4)配置签名信息
(5) 配置文件如下
1 | // build-profile.json5, 新增products, signingConfigs, modules.targets配置 |
1 | // entry/build-profile.json5 |
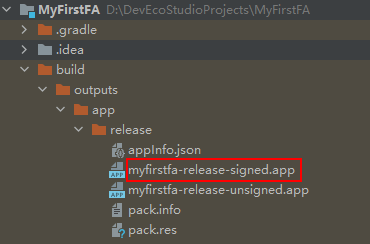
(6)编译打包(App + Hap)
1 | # 构建hap |
知识扩展或补充RN兼容缺陷
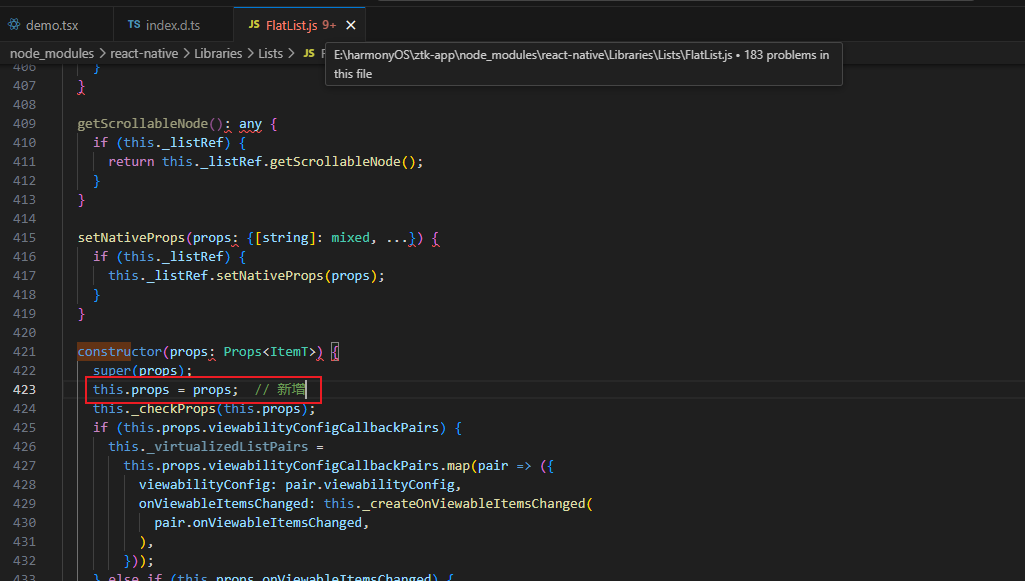
1. react-native Flatlist
node_modules\react-native\Libraries\Lists\FlatList.js
2. 填写 App 特征信息(备案)
https://help.aliyun.com/zh/icp-filing/basic-icp-service/user-guide/fill-in-app-feature-information
3. 签名文件.p12, .csr,.cer,.p7b 的区别
1 | // .p12(store file)-私钥 |
3.1 deveco studio -> build -> generate key
ps: 生成p12和csr密钥对
1 | 新建 storefile(.p12)文件时,并没有直接生成.p12 文件,说明 storefile 和和 crs 文件是同时生成的, |
3.2 在鸿蒙后台-新增证书
ps: CSR对证书签名,生成cer
1 | deveco studio生成的.CSR(理解:用公钥签名), 对证书(.cer)文件加密. |
3.3 在鸿蒙后台-新增profile
ps: App包名和证书绑定
参考文档
uni-app 编译支持鸿蒙
如何为不同的 product 产物配置签名信息?
打包正式版本
鸿蒙配置 APP 多目标构建产物
PS:nvue 编译到鸿蒙后非原生渲染,而是与 web 一样渲染,所以调用原生服务需要使用 uts 调用鸿蒙原生 API。